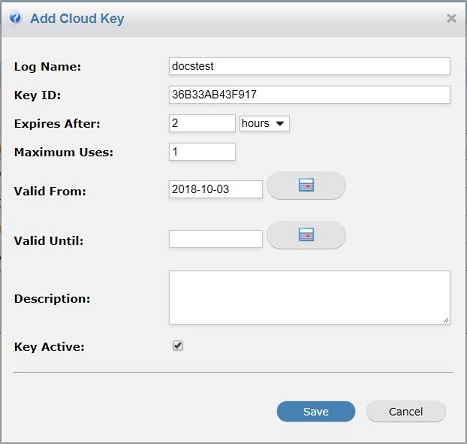
Adding or Editing a Cloud Key
Go to Settings > Cloud Key and follow these steps to add or edit a cloud key:
Click Add to add a new cloud key or click the edit
 icon beside the existing cloud key you want to edit.
Use the table below as reference to complete the Add Cloud Key or Edit Cloud Key window:
Field
Description
Log Name:
The name this cloud key will log in History when the key is used.
Key ID:
A unique string for this cloud key. You can use the randomly generated Key ID, or enter your own.
Expires After:
The length of time a cloud key remains active after being first entered during this session. This parameter only affects the current session, it will not invalidate the cloud key.
Maximum Uses:
The maximum number of times this key can be used before becoming invalid.
Valid From:
The date from which the cloud key will take effect.
Valid Until (Valid To:):
The date the cloud key will expire. If a date is not specified here, the key will remain valid indefinitely.
Description:
A description of the cloud key if entered.
Key Active:
If checked the key is active and can be used. If not checked the key is inactive and will be rejected when used.
Click Save to save changes or Cancel discard changes and close the window.
Once a cloud key has been added, copy the Key ID and send it to a user who can then enter it on a block page in this dialog box:
