Editing a Customer Account
Follow the steps below to edit an existing customer account.
Go to Customer Settings > Accounts.
Click the edit
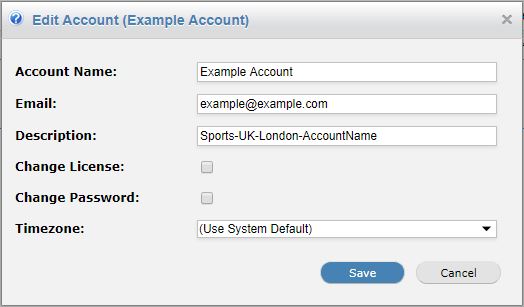
 icon under the Options column to the right of the account you want to edit. The Edit Account (account_name) window displays:
Using the table below as reference, complete the Edit Account (account_name) window.
Click Save to save changes or Cancel to ignore changes and close the window.
Customer Account Settings
Field | Description |
|---|---|
Account Name: | Name of the customer account, e.g. Example Coffee Company. |
Email: | Email address associated with this account, e.g. admin@example.com. This is the email address a customer admin will use to log into their WebTitan Cloud interface. |
Description: | A brief description of the account. This is a useful field for filtering and searching. This field is visible in the customer UI. |
License: | A license string you can assign to this customer for your own reference, e.g. customer reference number. This is not your WebTitan Cloud license. This field is not visible in the customer UI. If adding a customer account, enter a license string for your customer in the License field:  If editing a customer account, tick the Change License box to edit the existing license string:  |
Change Password: | This is the password a customer admin uses to log into their WebTitan Cloud interface. If adding a customer account, enter the password your customer will use to log into their UI in the password field (minimum of six characters):  If editing a customer account, tick the Change Password box to change the current password:  |
Timezone: | Time zone associated with this account. The correct time timezone ensures that Dashboard, History and Reporting information is accurate. |