DNS Settings
Go to System Setup > Network > DNS Settings to add or edit your DNS settings. Use the table below as reference to complete the DNS Settings fields:
Field | Description |
|---|---|
Domain: | The domain name of the WebTitan Cloud appliance, e.g. example.com. The domain and hostname is the same as the FQDN used to access WebTitan Cloud. For example, if the A record used to access the server is company.domain.com, the hostname is company and the domain is domain.com. |
DNS Server(s): | Enter the IP address of the primary DNS server and the IP addresses of any secondary DNS servers (the primary DNS server should be the fastest DNS server accessible). Click Add to add an IP address. All added IP addresses are listed below. Click the edit 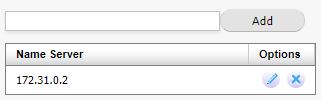 |
DNS-Forwarding: | Use only if you have installed your own WebTitan Cloud and want to foward to your own DNS resolvers (default: disabled). |
Cache Size (MBs): | The size of the cache to be stored (default: 300 MB). |
Flush Cache: | Click Flush to flush the cache. A status message will display when cache has been successfully flushed.  |

