Setting up a Cluster
Go to the Cluster tab and follow the steps below to cluster two or more SpamTitan Gateway appliances together. This allows their configuration settings to be synchronized and all nodes in the cluster to be centrally managed.

Install the same version of SpamTitan Gateway on each node you want to include in the cluster (nodes may be geographically dispersed). See Downloading and Installing SpamTitan Gateway.
Important
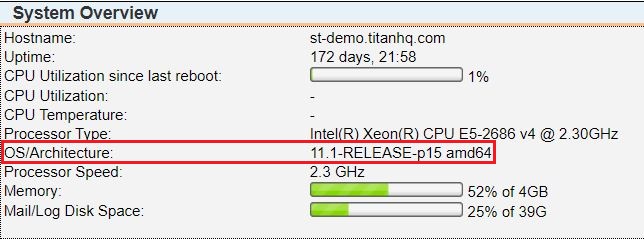
It is recommended to also use the same version of FreeBSD on each server. If using different versions, the cluster may need to be created on the server using the oldest version.
You can see what version of FreeBSD you are currently running on the Dashboard's System Overview (see System Dashboard) panel:

On node 1 (primary node), go the the Cluster tab and complete the fields as follows:
Enter the Cluster Shared Secret password. This must be the same on all cluster nodes.
Specify if cluster communication uses HTTP or HTTPS. If using HTTP, select No from the Use SSL: dropdown menu or if using HTTPS select Yes.
Note
This setting must be the same on all nodes in a cluster. If using HTTPS, the port number that HTTPS is configured to listen on must be the same on all cluster nodes (default port: 443).
Use the Use NAT: checkbox to specify if the system is NATed behind a firewall or not. If checked, specify the external IP of the machine in the NAT Address: field.
Note
If nodes can communicate directly with each other on interface IPs, using NAT is not recommended.
Do not populate the Cluster Member field.
On node 2 (child node), go the the Cluster tab complete the fields as follows:
Enter the Cluster Shared Secret password. This must be the same on all cluster nodes.
In the Cluster Member field, enter the IP address of node 1 (primary node).
Important
Additional settings are copied from the primary node to child nodes.
Click Join and you should see both nodes in the cluster table.
Repeat this process for all other nodes you want to add to the cluster.