Adding, Editing or Deleting an Email Alert
Go to Logs > Alerts and follow the steps below to add, edit or delete a new email alert.
Click on the Alarms tab so the following window displays:

Click the edit
 icon or the
  delete icon in the Options column to the right of an email alert that you wish to edit or delete. Tot delete several email alerts together, click the checkbox
  beside multiple alerts click Delete.
Click Add... and continue with these steps to add a new email alert.
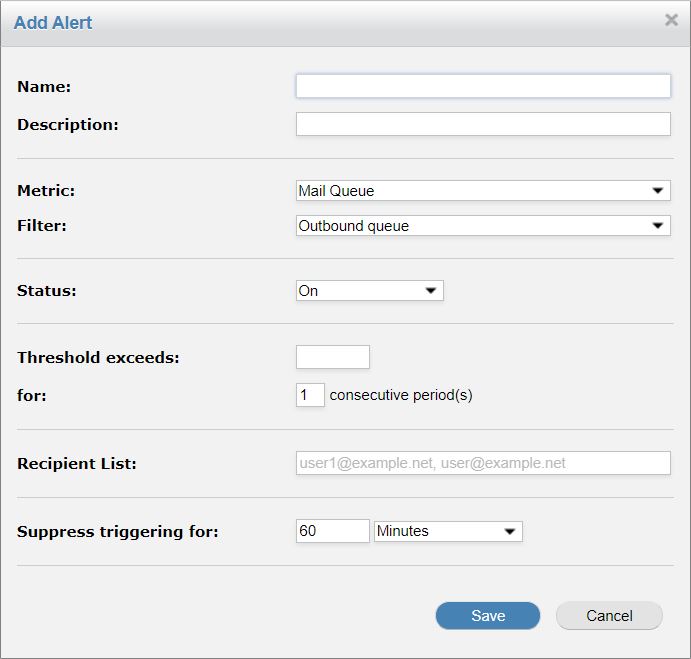
The Add Alert window displays. Using the table below as a reference, complete the field in the window.

Click Save to save this alert or Cancel to discard.
Field | Description |
|---|---|
Name: | A descriptive name for this alert. |
Description: | An optional description to associate with this alert. |
Metric: | Choose one of the following metrics to monitor:
|
Status: | Choose On or Off to decide the status of this alert. This setting can be edited to temporarily disable an alert. |
Threshold exceeds: | Specify a value above which the alert will trigger. This can be a percentage value or a numeric value, depending on the metric. |
For: | The number of consecutive periods that the alert has exceeded the threshold before firing the alarm. For example, you may only want the alarm to trigger if the inbound mail queue exceeds 1000 messages for 5 consecutive monitoring periods. This helps to avoid alarms when there are spikes in the mail traffic. |
Recipient List: | Enter a comma-separated list of email addresses to be notified when the alarm triggers. |
Suppress triggering for: | Once an alarm triggers, use this option to suppress it from triggering again for a specified period. This is useful to ensure you do not receive an excessive number of alerts if, for example, disk usage is above a certain threshold for an extended period. |