Create Auto Campaign Schedule
As an MSP, you can set up automatic campaign schedules for your customers by accessing Phishing Campaigns > Create Auto Campaign. You'll find four pre-configured schedules, which you can also customize, giving you both efficiency and flexibility in one interface.
Tip
Refer to the SafeTitan MSP Roadmap for additional help in planning and rolling out your security awareness campaigns.
From your MSP dashboard, go to Phishing Campaigns > Create Auto Campaign. The schedule options are in increments of 3, 6, 9 and 12-month durations:

They are pre-configured based on the following:
Campaign Frequency: How often a campaign runs during the schedule.
Each Campaign Duration: The length of time each campaign runs.
Schedule Starts: The timeframe within which the campaign schedule starts.
Schedule Ends: The date that the campaign schedule ends.
Template Option for Phishing lures: By default, both template categories, Business and Home & Personal, are enabled. This means that when the campaign is being created, a template is randomly chosen from either of theses categories.
Complexity: A template can be of Low, Medium, or High complexity and different combinations of these levels are pre-selected for you. The level of complexity relates to how sophisticated a lure is, and how likely a recipient is to interact with the lure.
Click Select in the schedule you want.
Enter a name for the campaign schedule in the Schedule Name field.

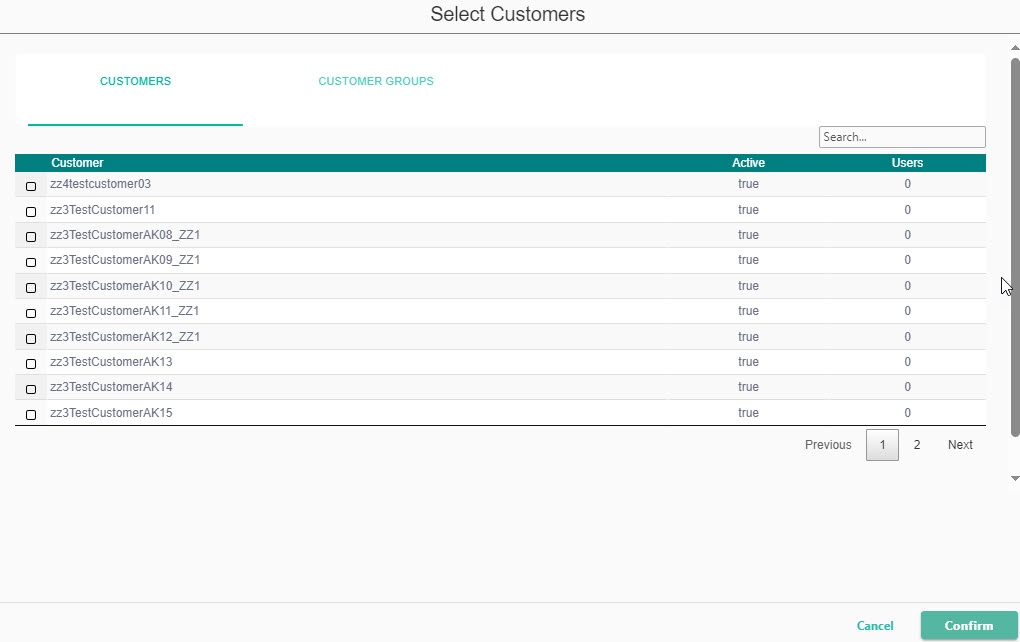
Select Add Recipients to open a window in which you can select individual customers as well as customer groups.

The window defaults to individual Customers but you can select Customer Groups at the top to change the view. You can also click on the headings to sort the content in the columns or use the Search field to find a specific customer or group.

When you are finished making your selections, select Confirm to continue.
If you want to customize any of the content, select Edit. The pre-populated fields become editable, as described below:
Campaign Details: In the Campaign Details section, you can change the number of campaigns you want to create, their frequency, and how long they should run. Note that the maximum number of campaigns you can enter is dependent on the frequency you choose, and your Frequency options are automatically adjusted, depending on the number of campaigns you enter. The guideline is two campaigns a month, as illustrated in the table below.
Frequency of Campaigns
Maximum Number of Campaigns
Every Two Weeks
1
Monthly
2
Quarterly
6
Annually
24
Depending on the length of the campaign schedule you are customizing, the campaign duration options range from 1 to 2 weeks (for a 3-Month Schedule) to 1 or 3 Months for longer schedules.
Scheduling & Lures: In this section, you can reschedule the campaign and change the Lure categories.
Select the Calendar
 icon under Schedule starting In and then select the month that you want your first campaign to begin running.
To customize the end date, select the dropdown arrow under Scheduling ending in. If you are customizing the end date of either the 3- or 6-month phishing campaign schedule, you can select an option between 1 and 24 months. The 9- and 12-month campaign schedules offer end dates of either 1 or 2 Years.
To adjust the Lure Categories for your campaigns, select the dropdown arrow in the Lure Categories field. All the lures are enabled by default, but you can choose Select None and then select the categories that you want.
Template Options: This section lets you adjust template types and their complexity levels.
When your phishing campaign is being created, it will randomly select one of the Lure Categories you enabled, and then create a template based on the template type(s) and complexity level(s) you selected.
When you're finished, select Create Schedule. A Summary Data window appears, providing the details of the Campaign Schedule you're about to create.
Select Confirm to proceed. The new campaign schedule appears in the list on the Phishing Campaigns page.