Modifying WebTitan Cloud Interface Settings
Go to Settings > Interface Settings > Interface Settings to modify your WebTitan Cloud user interface, which is fully customizable.
Using the table below as a reference, adjust your interface settings to determine how your WebTitan UI appears.

Field | Description |
|---|---|
Logo: | The logo that is displayed at the top left of the WebTitan Cloud screen. |
Upload New Logo: | To upload a new logo:
To revert to the default logo, click Reset opposite Reset to UI Defaults:. |
Set Page Title: | The title displayed in the browser tab for WebTitan Cloud. Edit the title and click Save. NoteThe contents of the Set Page Title: field is also used in PDF report headers. |
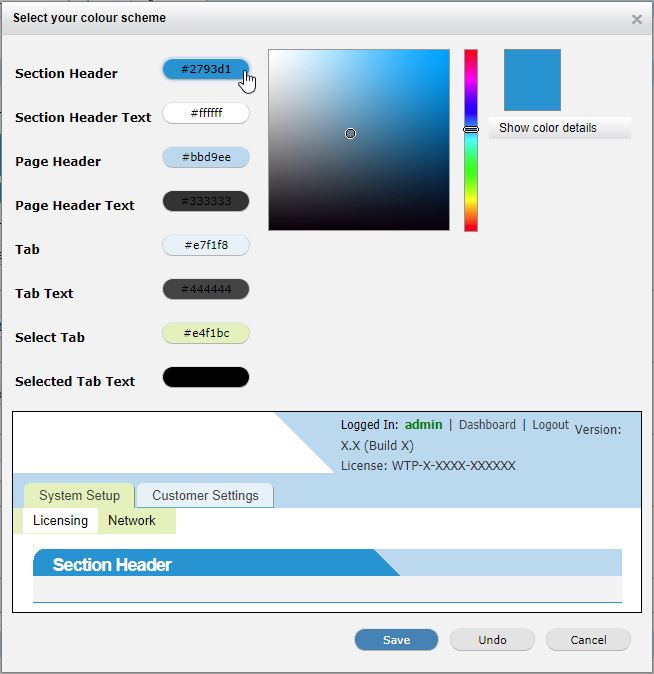
Choose a colour scheme: | To change the UI color scheme:
To revert to default colors, click Reset opposite Reset to UI Defaults:. |
UI Timeout Period (minutes): | Period of inactive time after which the user is logged out of WebTitan Cloud (default: 30 minutes). |
Reset to UI Defaults: | Click Reset to reset all interface settings to default WebTitan Cloud settings. |