Creating an Office 365 Outbound Connector
Follow our simple guide for the steps to create a smart host outbound connector between your Office 365 and SpamTitan.
Notice
The instructions below include information about external tools and are only intended as a guideline.
If you notice anything out of place, please email docs@titanhq.com and let us know.
Follow the steps below to create a smart host outbound connector between your Office 365 and SpamTitan.
Log on to your Office 365 Exchange Admin Center (EAC).
Note
If you are using Microsoft 365 Defender, log in to security.microsoft.com and select Exchange message trace from the sidebar menu to open your Exchange Admin Center.
Select Mail flow and then Connectors from the sidebar menu to view your connectors.
Select
 Add a connector and the 'New connector' window displays. Select the fields as shown:
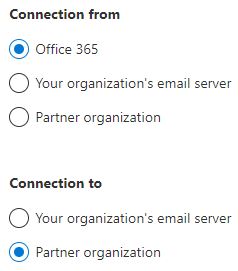
Select Next and the 'Connector name' window displays.
In the Name: field, give the connector a meaningful name, e.g. SpamTitan Outbound.
In the Description: field enter an optional description for this connector, e.g. Connector for SpamTitan Outbound.
Unselect Turn it on. You can enable this connector once you are ready to cutover mail flow.
Select Next.
In the 'Use of connector' window:
Select Only when email messages are sent to these domains.
Enter * in the dialog box and click
 .
.
Select Next.
In the 'Routing' window:
Select Route email through these smart hosts.
Enter the hostname or IP address for your smart host, e.g. cloud-out-c.spamtitan.com, and click
.Repeat Step 2 for each smart host you want to add. Select Next when done.
Select Next on the 'Security restrictions' window to accept the default TLS settings.
In the 'Validation email' window, you can enter an external email address (outside your organization) to test the connection:
Enter an external email address, e.g. test@example.com and click
.Select Validate and a test email will be sent to the address provided.
A summary page displays the information you have entered above. Verify the information is correct and click Next.
When you are ready to start routing mail through SpamTitan, ensure your connector status is 'On'. To do this, go to Mail flow > Connectors, highlight this connector and click the enable icon.
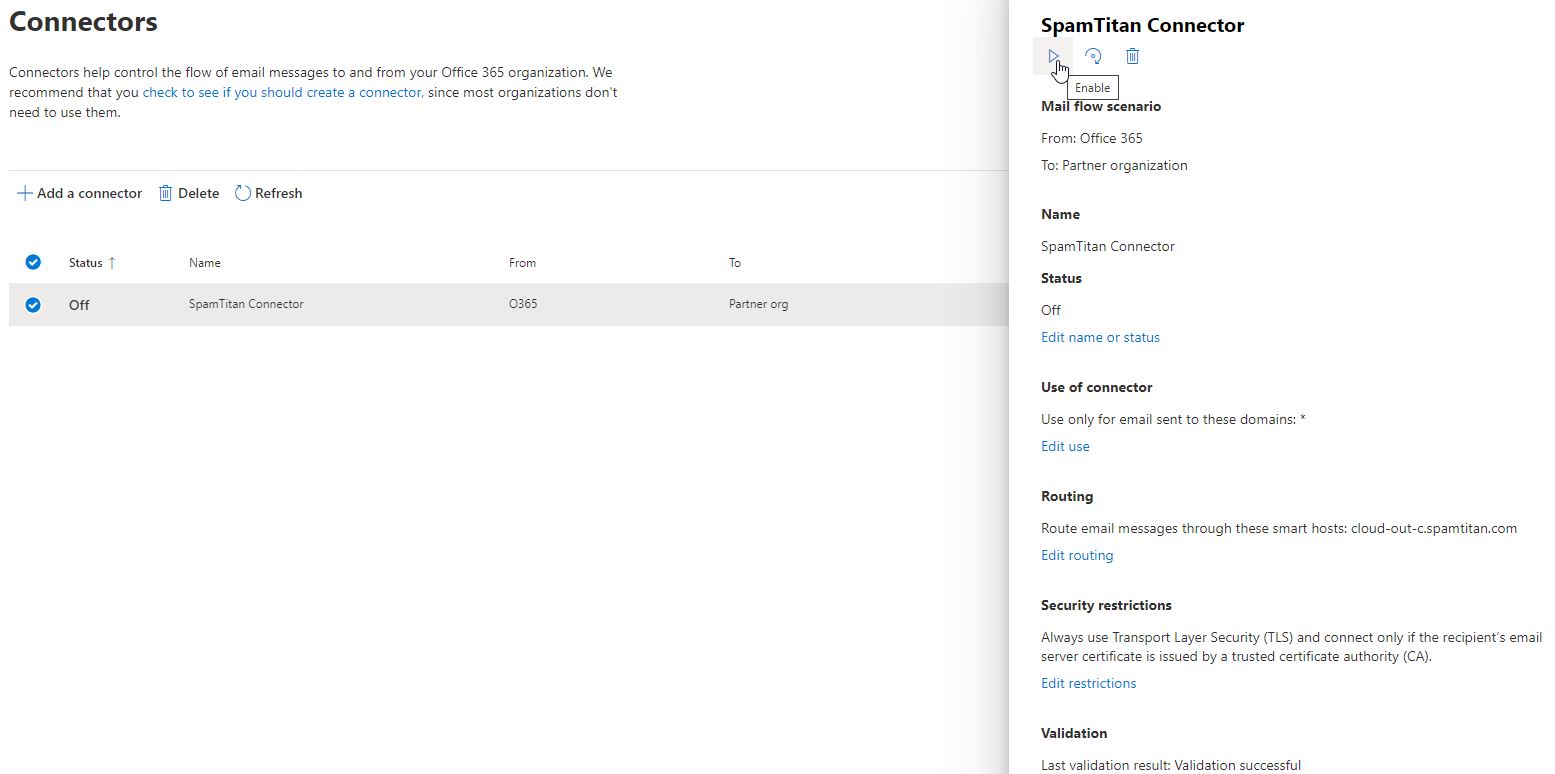
Your connector is now active and you can start routing outbound mail through SpamTitan.