Configure Consent Screen
As you follow the steps below, you’ll notice that you have several choices to make during the Consent setup. You’ll be personalizing the information that will be presented to users when they first access the App defined for the OAuth service.
In the Credentials window, select Create Credentials > OAuth client ID.
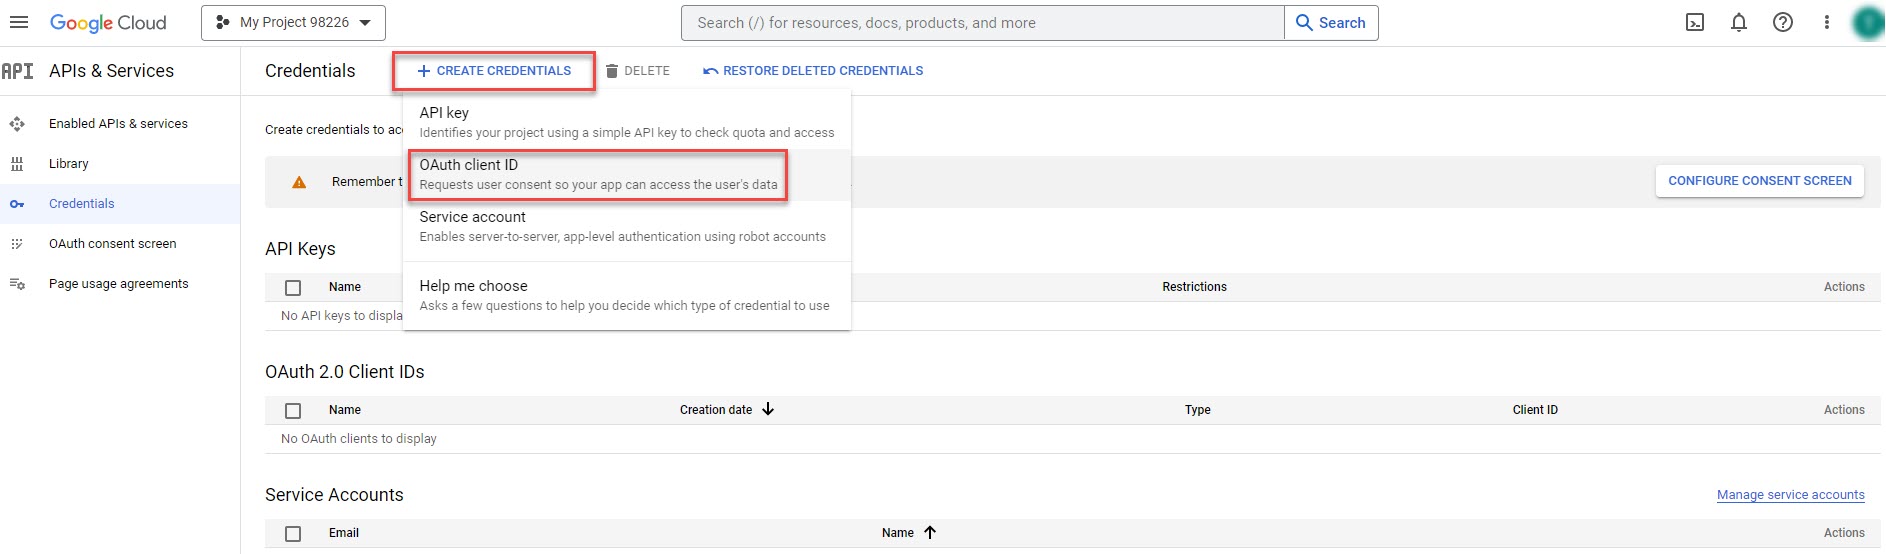
From the Create OAuth client ID screen, select Configure Consent Screen.

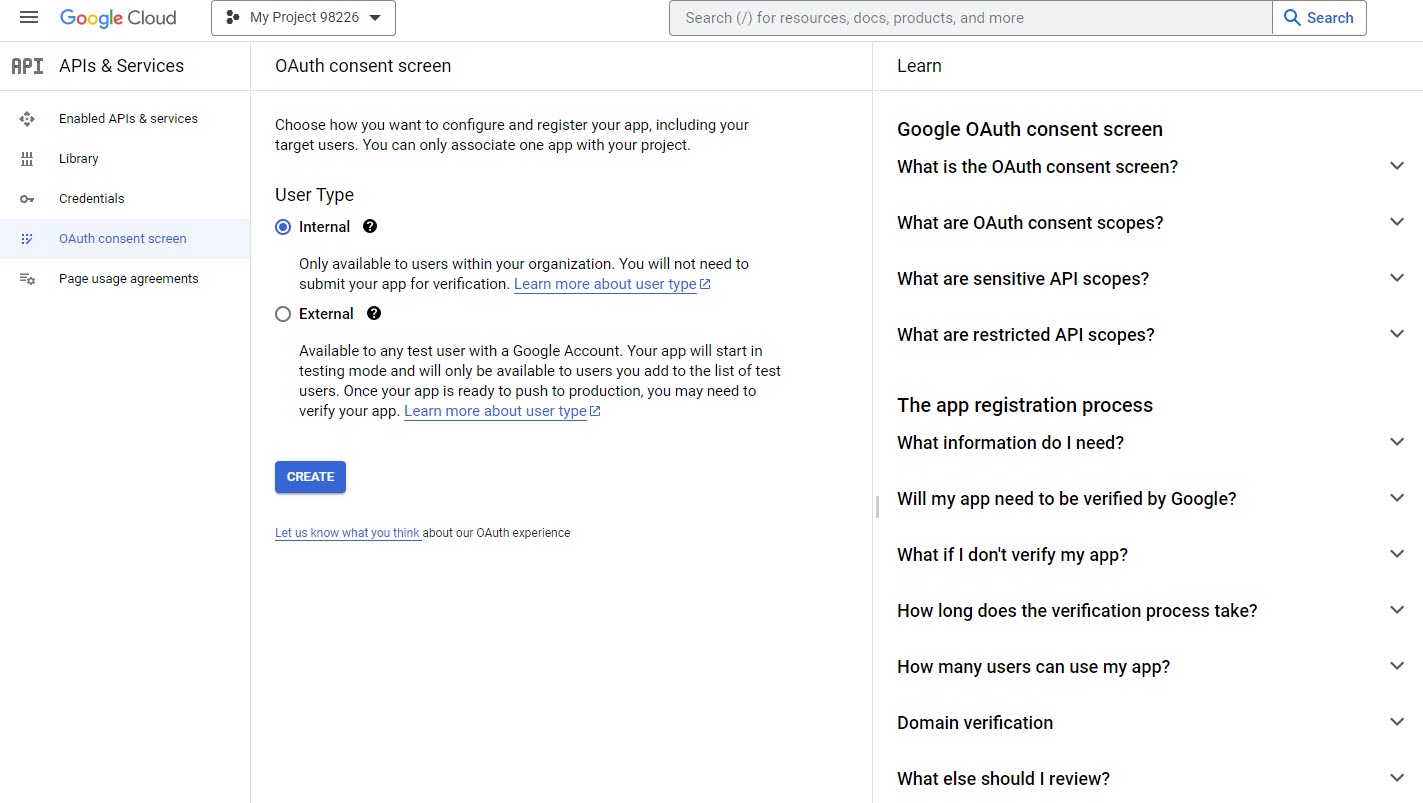
In the OAuth consent screen that opens, you will decide how to configure and register the App. Begin by selecting Internal for User Type, and then select Create.
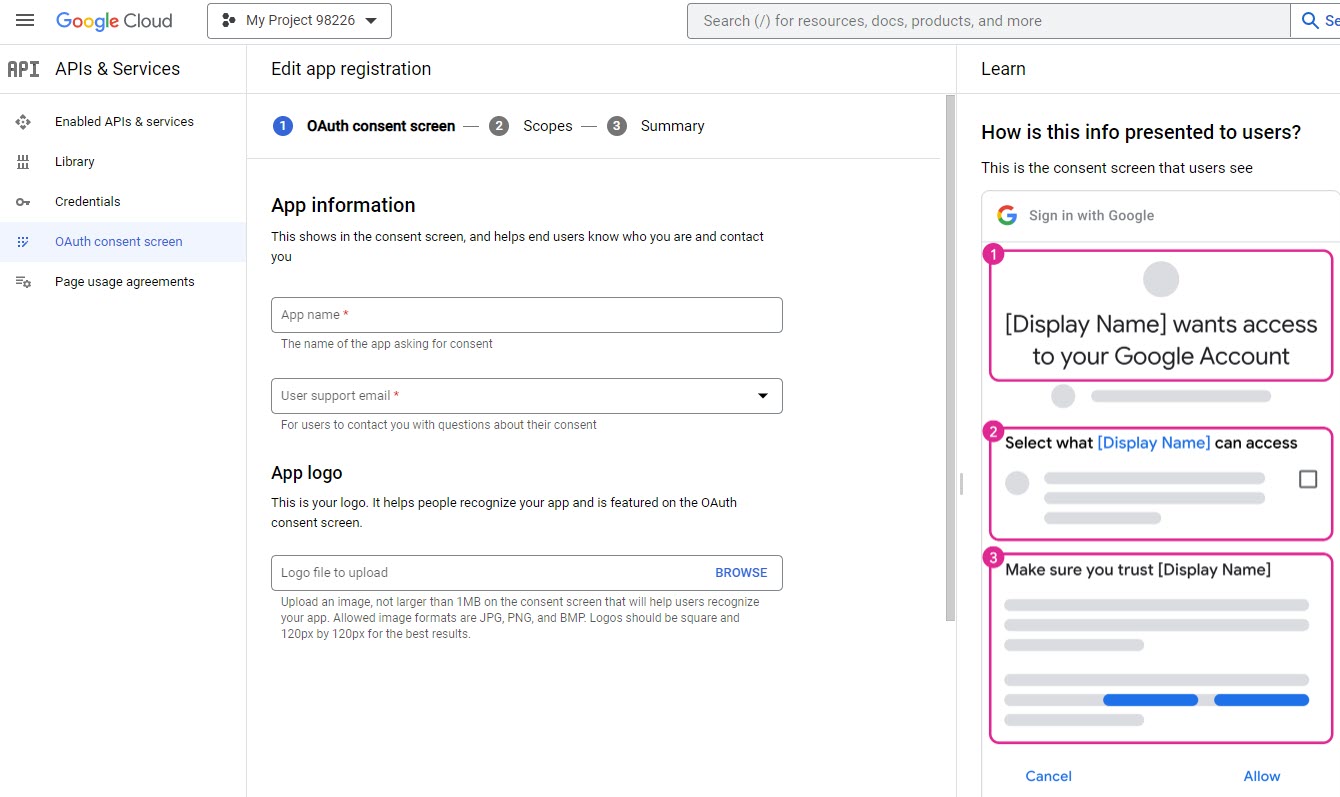
The Edit App Registration screen that opens has several sections to be completed.
In the App information section, enter the following details:
App name: Enter ArcTitan, as this is the name of the App that is asking for consent.
User support email: An email address is provided on the OAuth Consent Screen for users who have questions about giving their consent. Enter the email address of the Google Workspace administrator who will provide that support.
In the App logo field, you can select and upload your own logo, which will appear on the OAuth consent screen. Note that this is an optional field. Select Browse to locate and upload an image no larger than 1MB in JPG, PNG, or BMP formats.
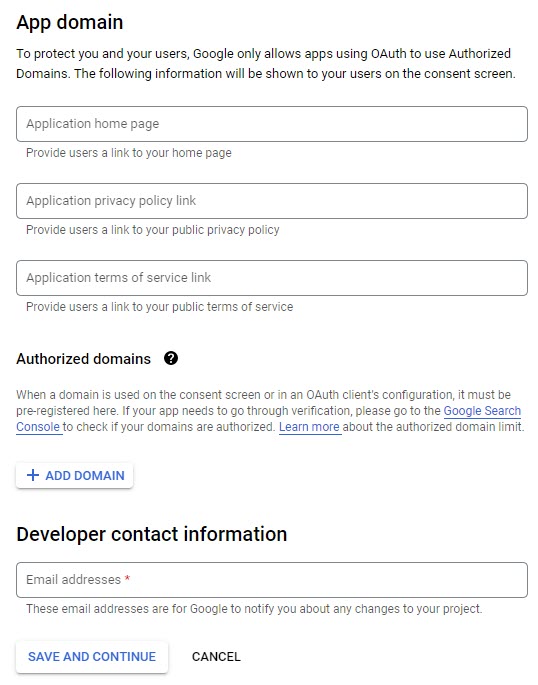
As Google only allows Apps using OAuth to use authorized domains, you need to enter the following information in the App Domain section. Note that this information will be shown to your users on the Consent screen:
Application home page: Enter the link to your home page.
Application privacy policy link: Enter the link to your public private policy.
Application terms of service link: Enter the link to your public terms of service.
If you want to use a domain on the consent screen or in an OAuth client’s configuration, you must pre-register it here, by selecting Add Domain. If your app needs to go through verification, then go to the Google Search Console to check if your domains are authorized.
In the Developer Contact Information section, enter the email address(es) that Google can use to notify you of any changes to your project.
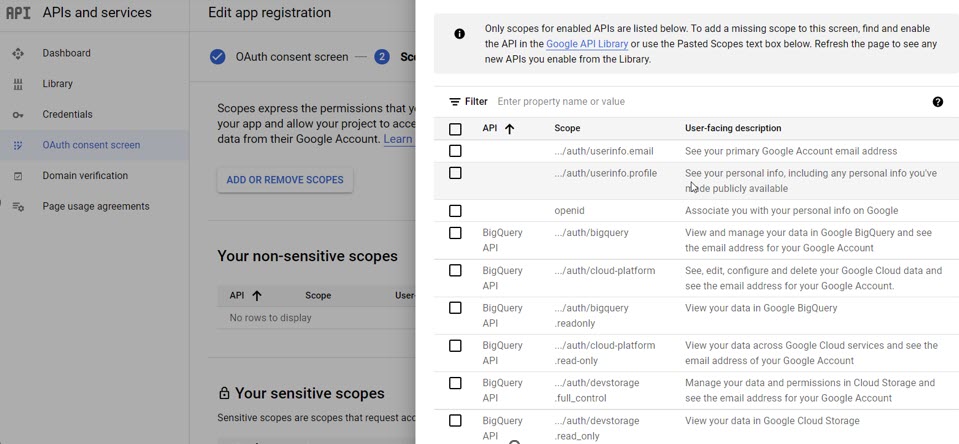
With regard to updating selected Scopes, you can use the Default settings, unless you know which scopes to assign.
After completing and saving the Consent screen, return to the Create OAuth client ID setup.