Add Users in Bulk with CSV File Upload
This document outlines how to import your users into your portal quickly and easily by uploading a Comma Separated Values (or comma delimited CSV) file.
If you have a large number of users to add to the portal, you can use the Bulk User Import method by uploading a CSV (comma-separated values) file. Most database tools and employee management systems allow you to export employee data as CSV files, allowing an efficient way of uploading data. All users in the CSV file are automatically added as members of your portal.
Follow the steps below to use this method:
First, create the CSV file, ensuring that it is formatted correctly before you upload it. You can use Notepad, TextEdit or Excel. Note that if you use Excel, you must export the data to a CSV file.
To see a sample CSV file, you can download a template from your dashboard:
Go to User Manager > Bulk User Import and select Download the User Template.
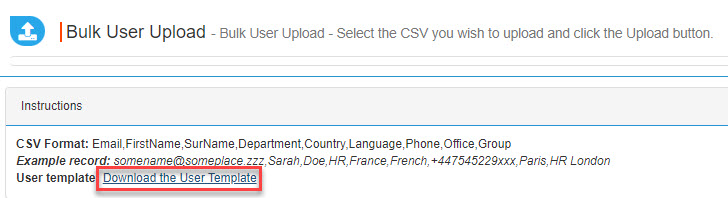
You can add 9 fields per user, which you'll see as headings in the sample CSV file. Note that the first three fields are required:
Email: (Required) Email address of the user.
Note
All email addresses in the CSV file must match the domain used to set up your portal.
If you require additional domains to be added to your portal, please contact support.
You can only use business email addresses. Google, Yahoo, Hotmail, Outlook.com or other public addresses are not accepted.
FirstName: (Required) User's first name.
SurName: (Required) User's last name.
Department: (Optional) Name of the user's department.
Country: (Optional) Name of the country in which the user resides.
Language: (Optional) Language spoken by the user.
Phone: (Optional) Mobile phone number of the user.
Office: (Optional) Name of the user's office.
Group: (Optional) Name of the user's group.
If you have created content in Excel, you can now export from Excel to a CSV file. Select File > Export > Change File Type and select CSV (Comma delimited) and Save As. Enter a filename.
To upload the CSV file, go to User Manager > Bulk user import and select Choose file.

Once you have selected the .csv file to upload, select Upload.

The import status dialog will update while displaying the number of users being imported.
To track progress of the upload, go to User Manager > User Import / Sync Progress. The number of users being added is displayed, which should match the number of users in your CSV file.
Note
Users added through bulk user import have no admin rights. See Promote Non-Admin user to Administrator to assign admin rights to a user.