Downloading and Installing SpamTitan Gateway
Learn how to download and install SpamTitan Gateway using this simple, step-by-step guide.
Read Before Installing SpamTitan Gateway and System Requirements to understand important prerequisites before following the steps below to download and install SpamTitan Gateway.
If you would like to follow a video overview of the installation process outlined below, see here:
Follow the steps below to download and install SpamTitan Gateway. This process is the same if you are installing on a virtual machine or on your own hardware (the process below uses a virtual machine).
Note
The current version of SpamTitan Gateway is . If you are using SpamTitan Gateway 7.13 or earlier and want to upgrade to version 8.00, please see SpamTitan Gateway 7.13 to 8.00 Upgrade Path.
If you did not download SpamTitan Gateway as part of a trial setup, contact Customer Support to receive an ISO download link.
Important
Before installing the ISO, you must ensure you have access to http://pkg-repo-1.titanhq.com
Once installed, all hotfixes made available since the ISO release will be picked up by the system within one hour.
Tip
If you experience any issues downloading an install file, please try a different browser.
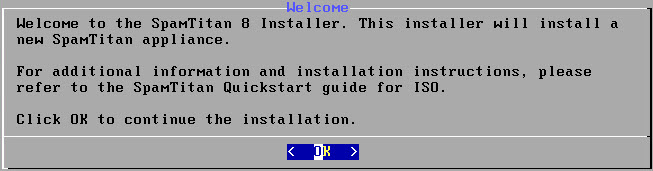
Launch your preferred VM software and run the ISO install file. Allow the welcome screen timer to count down and run until the following welcome screen displays. Press Enter to choose OK.
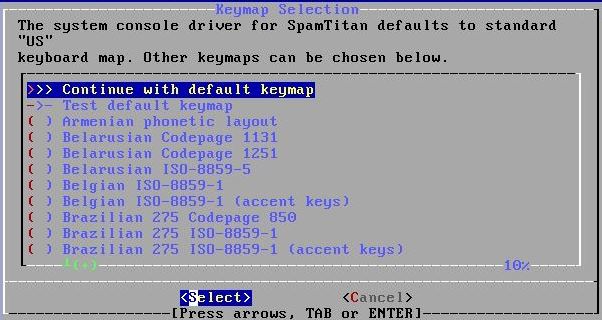
From the Keymap Selection window, select your keyboard map (default: US) and press Enter to Select.
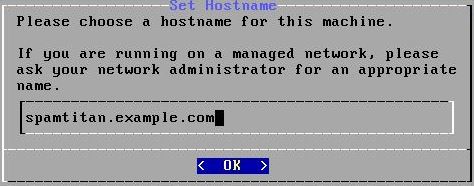
Enter the hostname for your SpamTitan Gateway machine - this must be a fully qualified domain name (FQDN). This server will also be used as the server's SMTP banner.
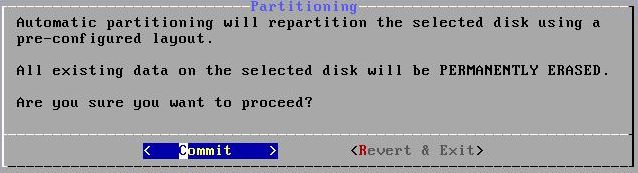
Press Enter to select Yes in the Confirmation window to confirm that the disk will be erased.
The disk is then automatically partitioned. In the Partitioning window, press Enter to select Commit.
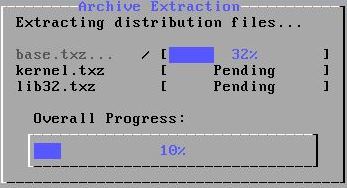
Allow the installer to run:
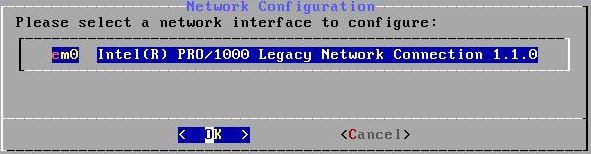
A list of all network interfaces found on the computer is shown in the Network Configuration window. Select one to be configured and press Enter to select OK. Additional network cards can be configured after the install process is complete.
Configure the IP address, subnet mask and default router for your SpamTitan Gateway machine. Press Enter to select OK.
Important
IP address, subnet mask and default router are mandatory fields for installation.
Enter the DNS servers you want to use and press Enter to select OK.
From the Time Zone Selector window, press Enter to select Yes if your machine is currently on UTC or No to select a custom time zone.
Allow the installer to install packages and reboot.
Your SpamTitan Gateway web interface is accessible after the machine has fully rebooted. To access, open a web browser and enter the IP address you configured for your SpamTitan server in Step 8 above.