Locking Down Your Office 365 Mail Server
Follow the steps below to lock down your inbound email flow in Office 365 to only accept email from your SpamTitan Private Cloud IPs (these were sent to you on setup). This requires you to create a receive connector in Office 365.
Important
If you are using a SpamTitan Cloud private instance, use your own private SpamTitan IPs to lock down your inbound email flow. However, if you are using the SpamTitan shared cloud instance, please use the following IPs:
54.87.170.50 (pax8-us-east-1.titanhq.com)
52.204.2.29 (pax8-us-east-2.titanhq.com)
Log on to your Office 365 Exchange Admin Center (EAC).
Click mail flow in the left menu.
Click connectors in the top menu to view your connectors.
Click the add icon
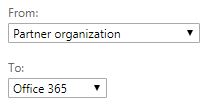
 and the 'Select Your Mail Flow Scenario' window displays. Complete the fields as shown:
Click Next and the 'New connector' window displays.
In the Name: field change the connector's name to SpamTitan to Office 365. Click Next.
In the 'How do you want to identify the partner organization?' window:
Click Use the Sender's Domain. Click Next.
Click the add
 icon and the 'add domain -- Webpage Dialog' window displays.
Enter * in the dialog box and click OK.
Click Next.
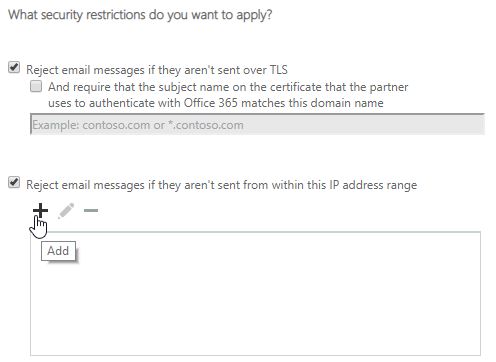
In the 'What security restrictions do you want to apply' window:
Check Reject email messages if they aren't sent over TLS.
Important
This option required that outbound TLS is enabled in SpamTitan.
Select Reject email messages if they aren't sent from within this IP address range.
Click the add
 icon to enter the SpamTitan IP address ranges. Click OK.
Important
If you are using a SpamTitan Cloud private instance, use your own private SpamTitan IPs to lock down your inbound email flow. However, if you are using the SpamTitan shared cloud instance, please use the following IPs:
54.87.170.50 (pax8-us-east-1.titanhq.com)
52.204.2.29 (pax8-us-east-2.titanhq.com)

Click Next.
A summary page displays the information you have entered above. Verify the information is correct and click Save.